PropNode Product Demo
See how PropNode simplifies your property-management workflow.
Explore how to organise clients, properties, tenants, rent cycles and payment records from one clear workspace.
6
Guided steps
10 min
Average setup
Simple
Clear guidance
Dashboard overview imagedashboard.png
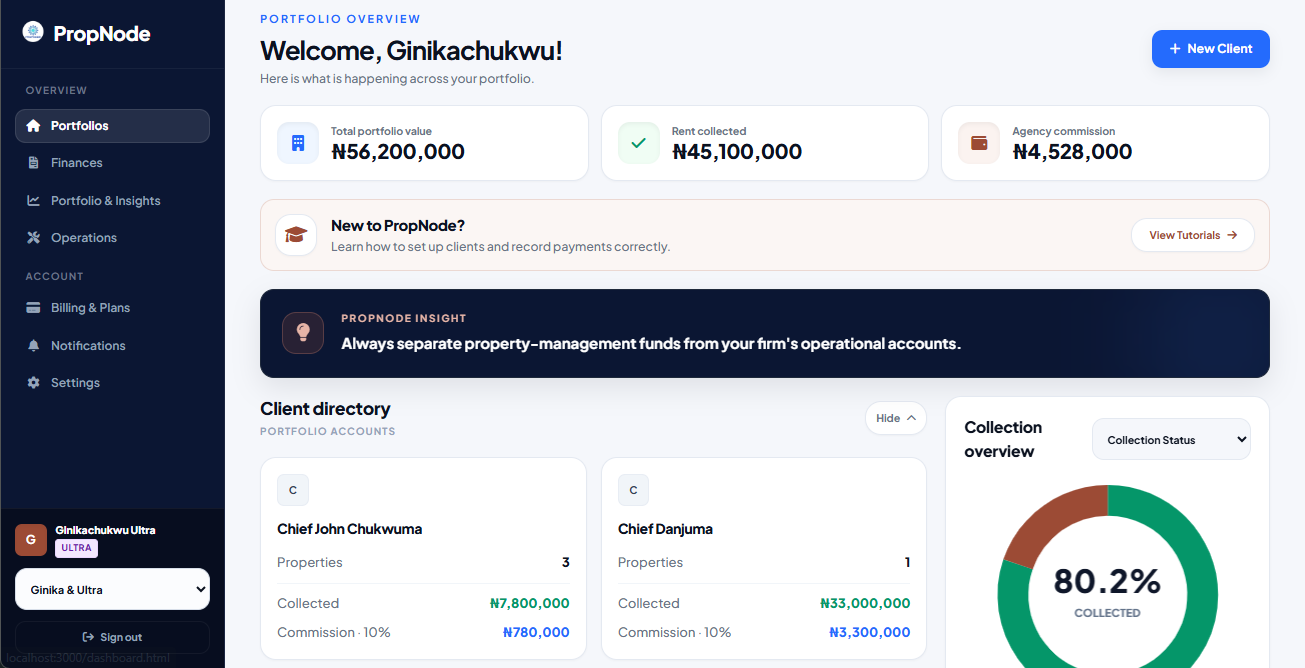
Start here
Full operational walkthrough
PropNode operational demo
Add your video embed here when it is ready
01
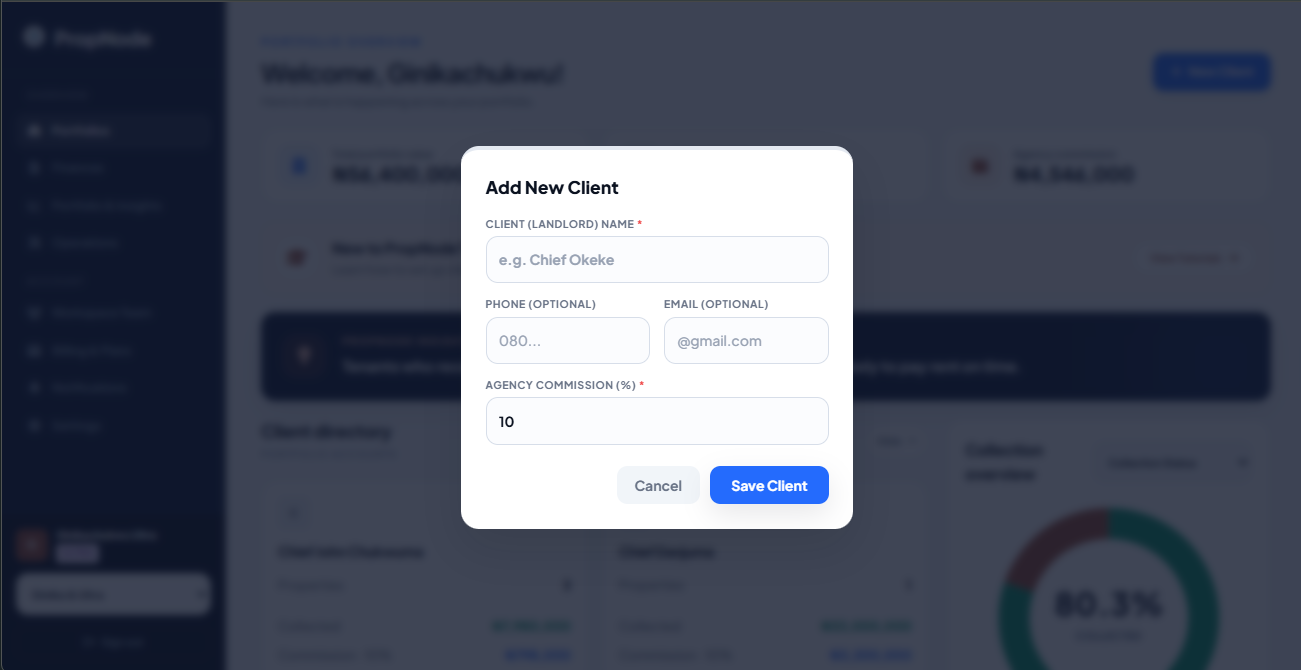
Add your first client
Landlord profileEvery property starts with the person or organisation that owns it.
- Open your Portfolio Dashboard.
- Select New Client at the top of the page.
- Enter the client’s contact information and your agreed agency commission.
- Review the details, then select Save Client.
Use the client’s active phone number and email so future reports and reminders reach the right person.
Client creation screenclient.png
02
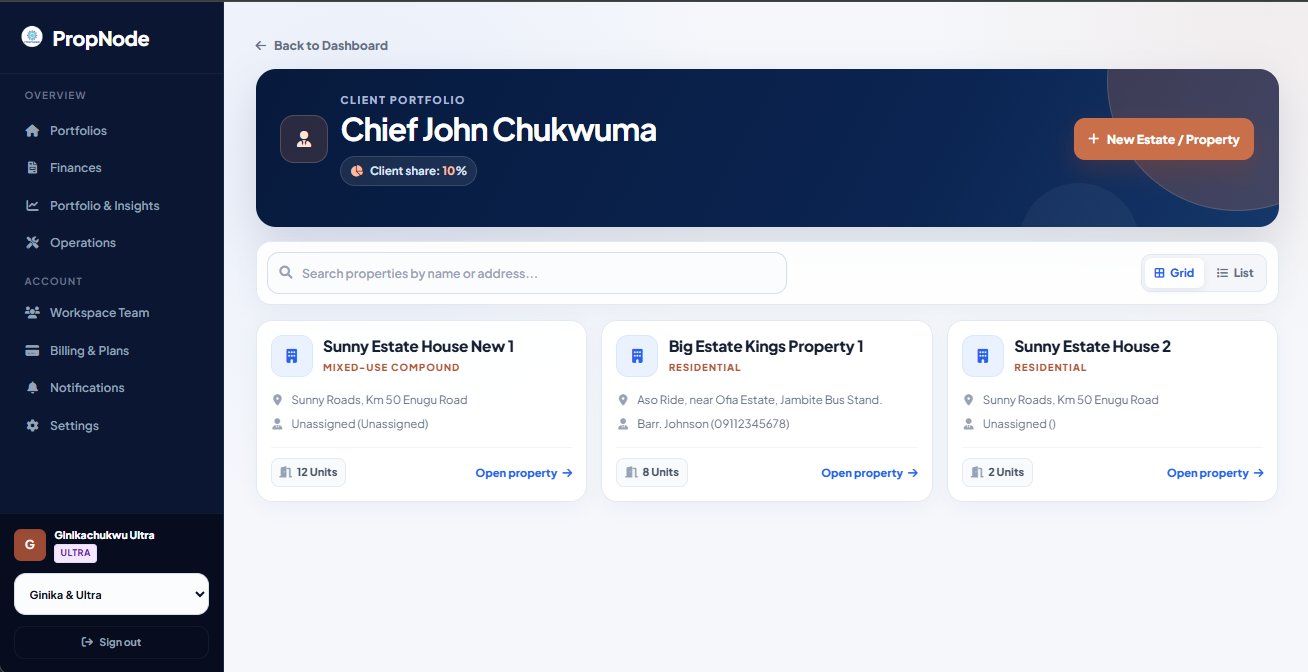
Create a property or estate
Portfolio setupConnect each physical property to the correct client portfolio.
- Open the client card you created in Step 1.
- Select New Estate / Property.
- Add the property name, address and caretaker information where applicable.
- Select Save Estate to add it to the property gallery.
Use a clear property name and complete address. This makes reports and searches easier later.
Property creation screenproperty.png
03
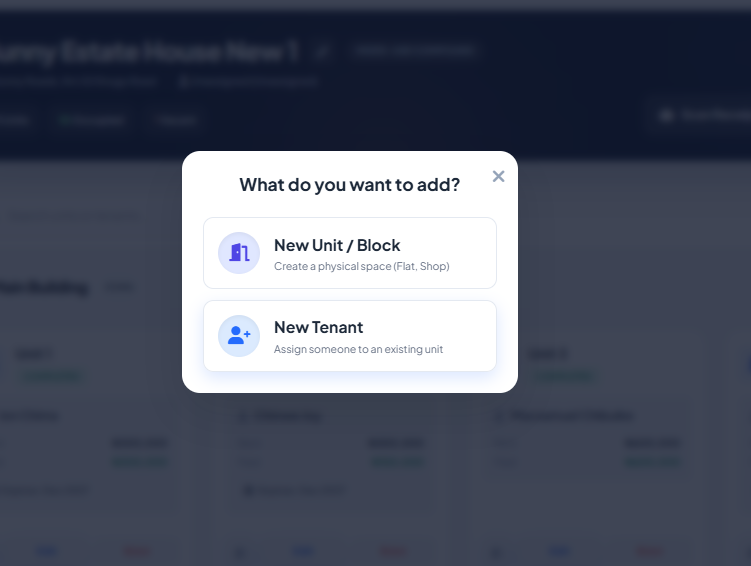
Add blocks and units
Property structureMap the flats, shops, offices or rooms inside the property.
- Open the property to enter its Estate Dashboard.
- Select Add Unit / Tenant, then choose New Unit / Block.
- Create a block or building name if none exists yet.
- Add the unit number and type, then save the details.
Keep unit names consistent, such as “Flat 1” or “Shop 04”, so the portfolio stays easy to scan.
Unit and block setupunit.png
04
Assign a tenant
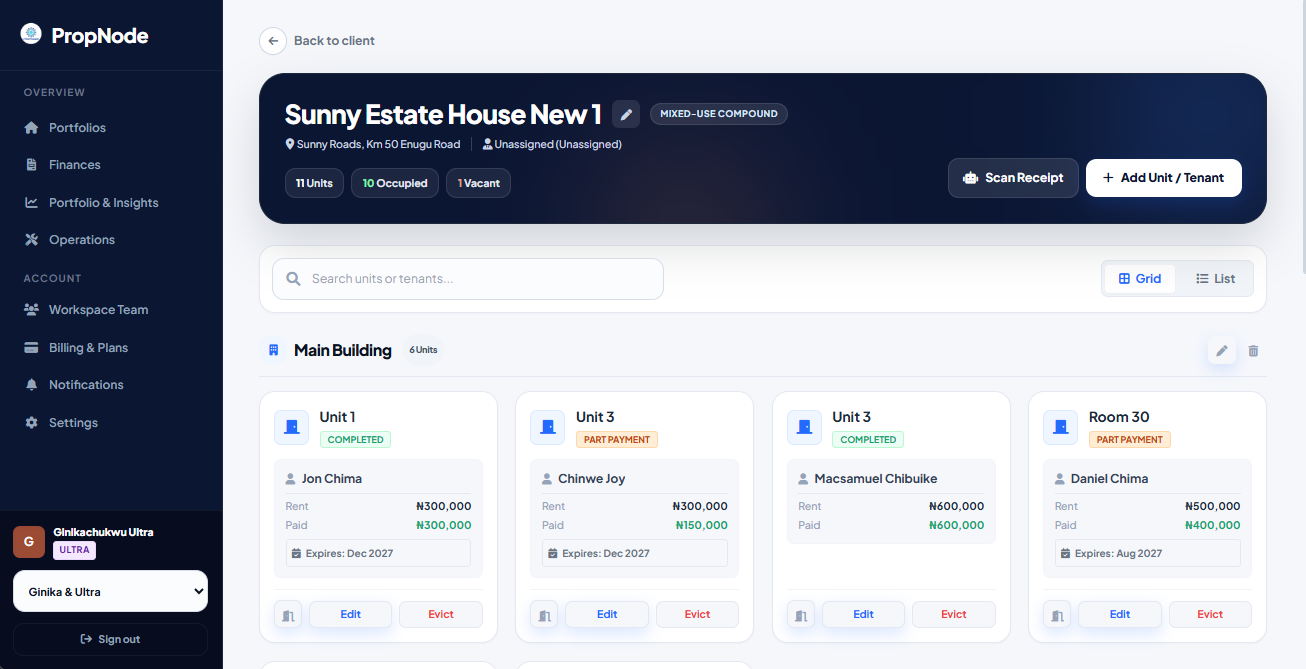
Rent trackingConnect a tenant to a vacant unit and begin tracking their rent cycle.
- Select Assign on the vacant unit.
- Enter the tenant’s name, phone number and agreed rent.
- Set the rent start date and duration. PropNode calculates the expiry date.
- Add any payment received, then select Save Tenant.
Check the start date carefully. It determines when PropNode begins showing expiry information.
Tenant assignment screentenant.png
05
Record a payment
Financial recordKeep the tenant balance and financial centre accurate after each payment.
- Open the tenant record from the Estate Dashboard.
- Select Edit and update the amount paid.
- For a renewal, also update the rent start date for the new cycle.
- Save the record. PropNode updates the balance and financial ledger.
Enter the new total amount received when editing an existing tenant payment record.
Payment recording screenpayment.png

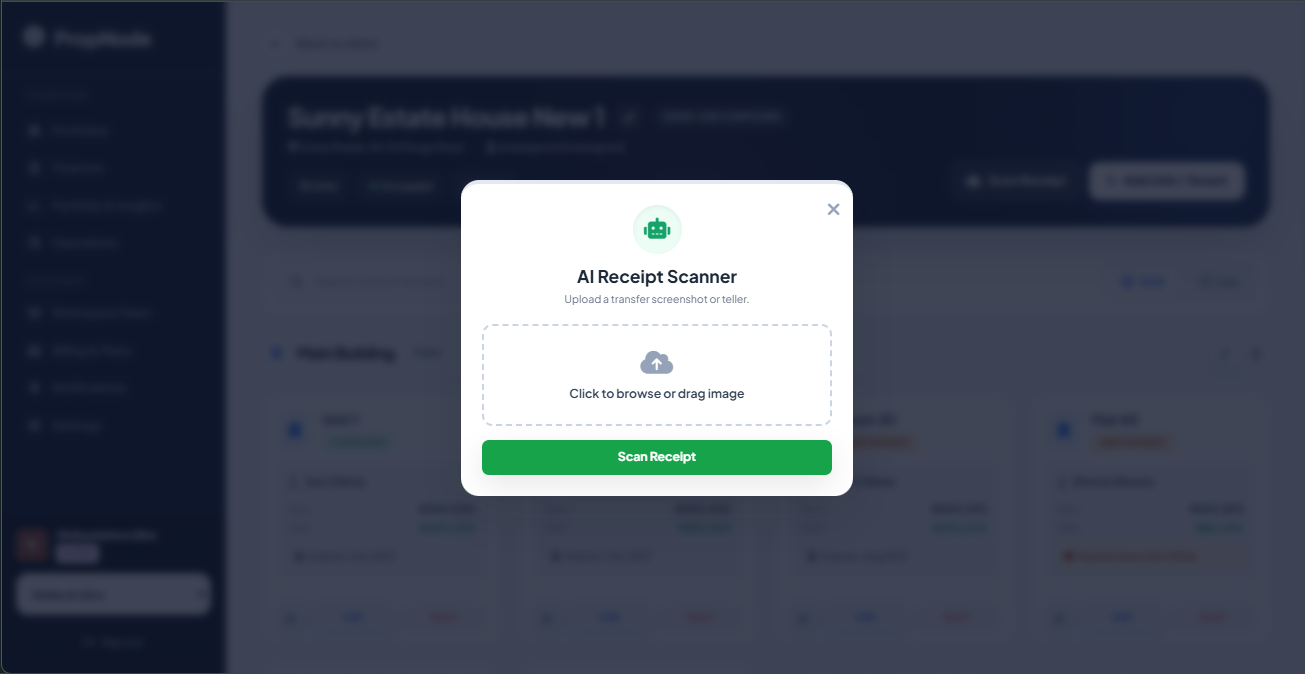
Scan a payment receipt
AI assistedExtract receipt details faster, then confirm them before updating the ledger.
- Select Scan Receipt from the Estate Dashboard.
- Upload a clear bank transfer screenshot or teller image.
- Review the payer name and amount extracted by the scanner.
- Select the correct tenant, then confirm the payment.
Always verify the extracted amount and tenant before confirming. The scanner assists entry; your review protects the record.
AI receipt scannerscanner.png
Want to see PropNode using your own workflow?
Book a live walkthrough and we will show you how PropNode fits your portfolio or agency.